
A paver patio is the single best upgrade you can make to a Tucson desert backyard. Most Tucson backyards go unused. The sun is relentless, the ground is unforgiving, and a plain dirt or gravel yard doesn’t invite anyone outside. A properly built paver patio fixes that; it creates a surface that handles desert heat, sheds monsoon rain, and turns your backyard into a space you actually use.
This guide is written from direct masonry experience in Southern Arizona. Real numbers. Real installation process. Real Tucson-specific insight, so you can plan with confidence and avoid the mistakes that cost homeowners thousands.
Why Pavers Outperform Concrete in Tucson’s Desert Climate
Tucson’s ground is complicated. Beneath the topsoil sits caliche, a dense, calcium-rich hardpan layer that creates uneven drainage and resists excavation. During monsoon season, clay soils absorb water rapidly and expand, then crack and contract as they dry out. Poured concrete doesn’t adapt to that movement. It locks rigid, and eventually the entire slab fractures.A paver patio transforms any unused Tucson backyard into a clean usable outdoor space.
Pavers behave differently. Individual units on a compacted sand and gravel bed absorb minor ground shifts without cracking across the surface. If a section sinks after a heavy storm, you lift those pavers, re-level the base, and reset them, no jackhammer, no concrete saw, no costly demolition. Over 20 to 30 years, that repairability alone justifies the modest cost difference.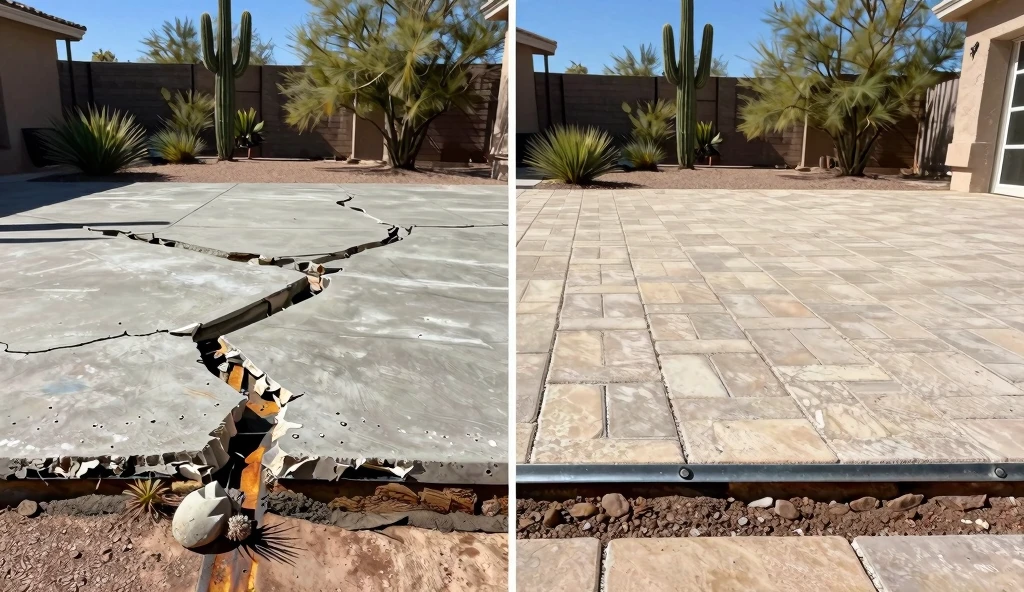
Paver Patio Ideas That Work for Arizona Desert Homes
Most design inspiration online was photographed in cooler, wetter climates. Dark pavers, dense plantings, and deep wood tones look heavy and impractical under Tucson’s sun. Here’s what genuinely works in the desert.
Light-Colored Concrete Pavers for Heat Comfort
Surface temperature matters enormously here. Dark pavers can hit 160°F on a July afternoon. Lighter shades of cream, sandstone, and light gray stay 20 to 30 degrees cooler underfoot. For any patio you’ll use barefoot, colour is a practical decision, not just aesthetic. The right paver patio design makes your home stand out in any Tucson neighborhood.
Herringbone Pattern for Durability and Strength
The 45-degree herringbone is one of the most structurally sound paver layouts available. Pavers lock against each other diagonally, resisting lateral shifting far better than straight-running patterns. It’s the layout most experienced masonry contractors recommend for high-traffic areas, heavy furniture, or vehicle access points.
Paver Patio With Fire Pit for Year-Round Use
Tucson winters are mild by day and cold by night, ideal fire pit weather from October through March. A designated fire pit zone extends your outdoor season and creates a natural gathering point. Options range from a flush built-in masonry surround to a simple gravel landing for a portable unit. Either approach works well depending on your budget and layout goals. A well-sealed paver patio handles Tucson monsoon rain and desert heat better than any other surface.
Raised Patio Design for Sloped Tucson Lots
Foothills properties and older neighbourhoods frequently have grades too steep for a simple flat pour. A raised or tiered patio design builds into the slope rather than fighting it, solving drainage naturally while creating distinct outdoor levels. It costs more than a flat installation but often produces the only genuinely usable result on a sloped lot. Most Tucson homeowners who invest in a paver patio never go back to concrete or gravel.
Gravel and Paver Combination for Desert Aesthetics
Alternating larger-format pavers with decomposed granite or pea gravel is a popular choice across Tucson’s desert-integrated backyards. It reduces material cost, maintains a natural desert palette, and allows water to permeate rather than sheet across the surface, a meaningful advantage during monsoon season.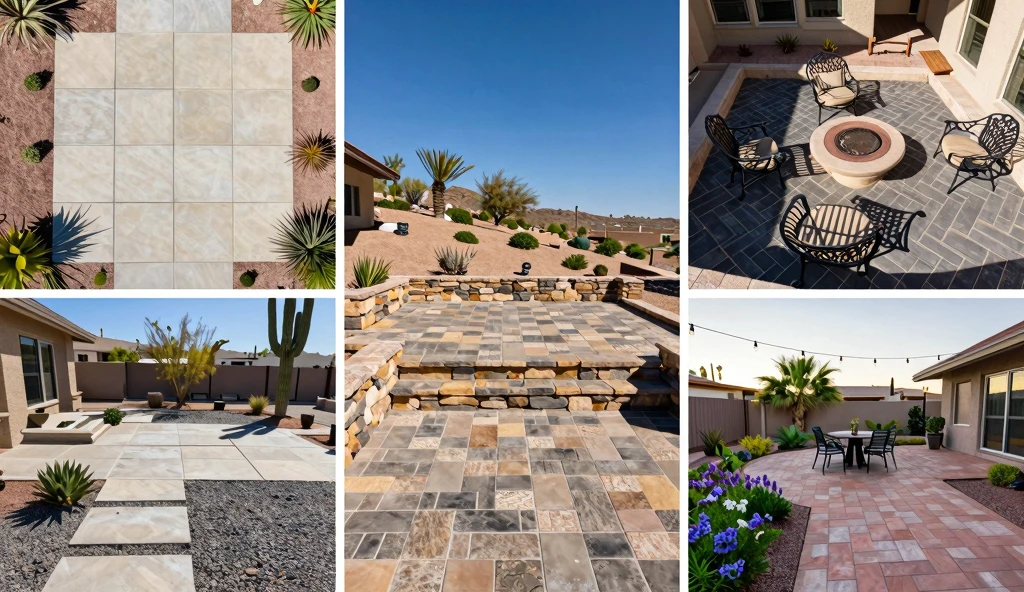
Paver Patio Cost in Tucson: Honest Numbers
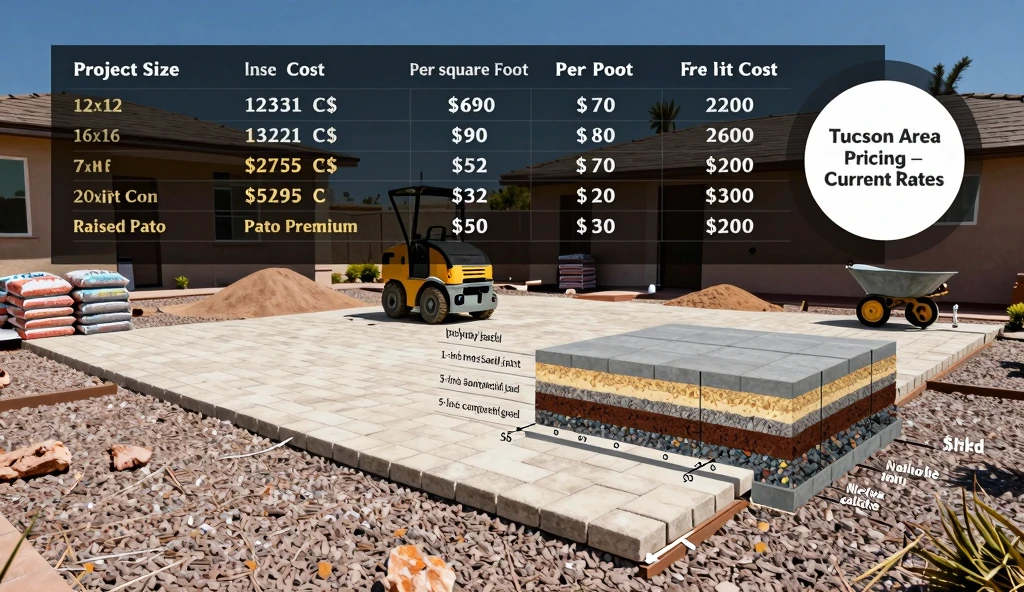
Project Size | Estimated Installed Cost |
12×12 paver patio | $1,800 – $3,800 |
16×16 paver patio | $3,200 – $6,400 |
20×20 paver patio | $5,000 – $10,500 |
Per square foot | $12 – $25 installed |
Raised or elevated patio | Add 25–40% |
Fire pit area addition | $900 – $3,500 |
These figures include excavation, base material, sand bed, pavers, edging, and labour. They do not cover major caliche removal, significant re-grading, outdoor lighting, or built-in seating walls. A properly graded paver patio prevents water pooling during Arizona monsoon season.
What Drives the Price Higher
The paver material itself is rarely the biggest cost variable; site conditions and labour are. Three things consistently push projects above initial estimates:
- Caliche removal: Breaking through the hardpan layer adds equipment time and disposal cost
- Drainage engineering: Poor natural drainage often requires grading adjustments or a French drain
- Base depth: Proper base preparation takes more material and labour than most low quotes account for
For a comparable look at how hardscape costs break down across different project types in Tucson, the Smart Retaining Wall Cost Tucson Guide covers the same base prep, drainage, and labour factors, directly applicable to patio projects. Getting multiple quotes before starting your paver patio project saves you money and stress.
Hidden Costs Worth Planning For
Your paver patio cost depends heavily on size, materials, and base preparation. Even clean, well-quoted projects carry expenses that surprise homeowners:
- Municipal permit fees (Tucson and Pima County requirements vary by project scope)
- Removal of an existing concrete slab or old surface
- Landscape repair around the excavated perimeter
- Sealant application, if not included in the base quote
Best Paver Materials for Tucson’s Desert Environment
Material | Heat Performance | Durability | Cost | Best For |
Light concrete pavers | Good | Excellent | $$ | Most budgets, most styles |
Travertine | Outstanding | Excellent | $$$ | Premium patios, barefoot use |
Brick pavers | Fair (absorbs heat) | Outstanding | $$ | Traditional & Southwestern homes |
Natural flagstone | Varies | Good–Excellent | $$–$$$ | Desert-integrated aesthetics |
Pro Tip: Travertine’s natural porosity creates a surface noticeably cooler than concrete in direct sun, a meaningful advantage during Tucson’s peak summer months. It requires sealing to prevent staining, but rewards the maintenance with exceptional performance.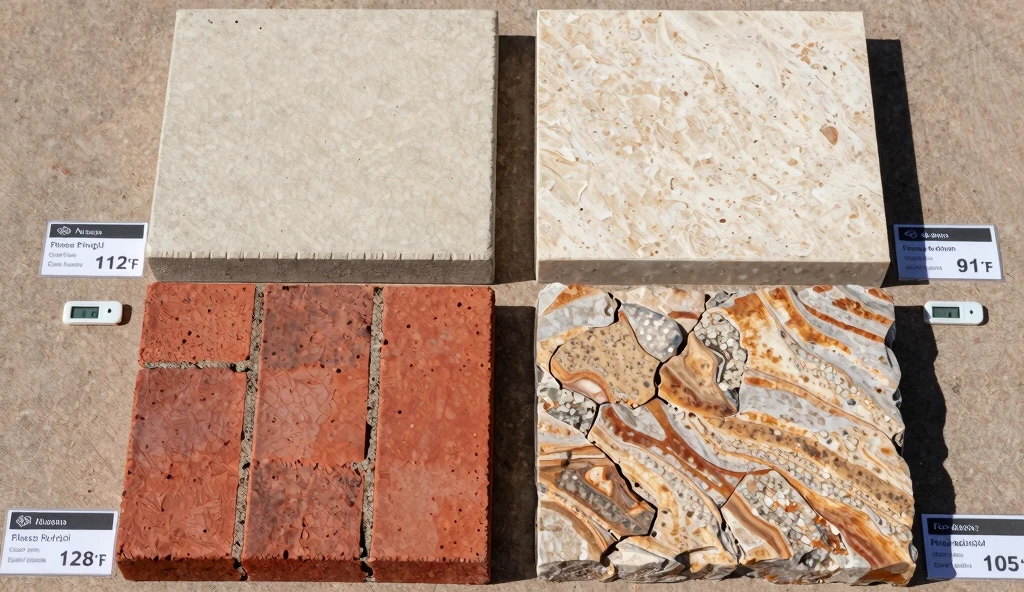
How Paver Patio Installation Works: Step by Step
Every step of paver patio installation directly affects how long the surface lasts. Understanding the process helps you evaluate contractor quotes, ask sharper questions, and make smarter DIY decisions.
Step 1: Layout and Drainage Planning
Before any digging, the area is marked with string lines and stakes. The critical detail at this stage: establishing a consistent slope, typically 1 inch of drop per 8 linear feet, directed away from the house foundation. In Tucson, where monsoon rainfall can dump 2 inches in a single hour, getting drainage direction right from the start isn’t optional. It’s the difference between a dry patio and a flooded one.
Step 2: Excavation and Caliche Management
Standard depth is 8 to 10 inches, accounting for the gravel base, sand bed, and paver thickness. In Tucson, caliche commonly appears within the first few inches of digging. Breaking through it requires specialized equipment and adds time and cost. Any contractor who doesn’t mention caliche in your initial conversation hasn’t done much local work.
Step 3: Gravel Base Installation
Crushed aggregate goes in at a minimum of 4 to 6 inches on typical Tucson soil. It’s added in layers and compacted with a plate compactor between each pass, not dumped in one thick lift. This step is the structural foundation of the entire patio. Rushing it is the primary reason patios sink and shift prematurely in Arizona’s expansive soils.
Step 4: Sand Setting Bed
One inch of coarse concrete sand is screeded flat across the compacted gravel. Not play sand. Not masonry sand. Concrete sand which compacts correctly under load and holds grade. The screed is pulled across parallel rails to produce a perfectly even surface before a single paver is placed.
Step 5: Paver Installation
Starting from a fixed corner or straight edge, pavers are set tightly together and tapped level with a rubber mallet. Cut pieces go in last along the perimeter, trimmed with a wet saw for clean edges. Throughout this stage, a level and string lines confirm that the drainage slope is maintained across the full surface.
Step 6: Edge Restraints and Border
Steel or heavy-gauge plastic edging is secured along the entire perimeter to prevent the field from spreading outward under traffic over time. A decorative masonry border set in mortar is a premium upgrade; it adds visual definition and permanently eliminates edge creep.
Step 7: Polymeric Sand and Sealing
Polymeric sand is swept into every joint, compacted, and activated with water to form a semi-rigid bond. Regular sand washes out under monsoon rain and becomes a weed and an entry point within a season. After curing, a UV-resistant penetrating sealant is applied to lock in colour, repel staining, and protect the joint sand long-term.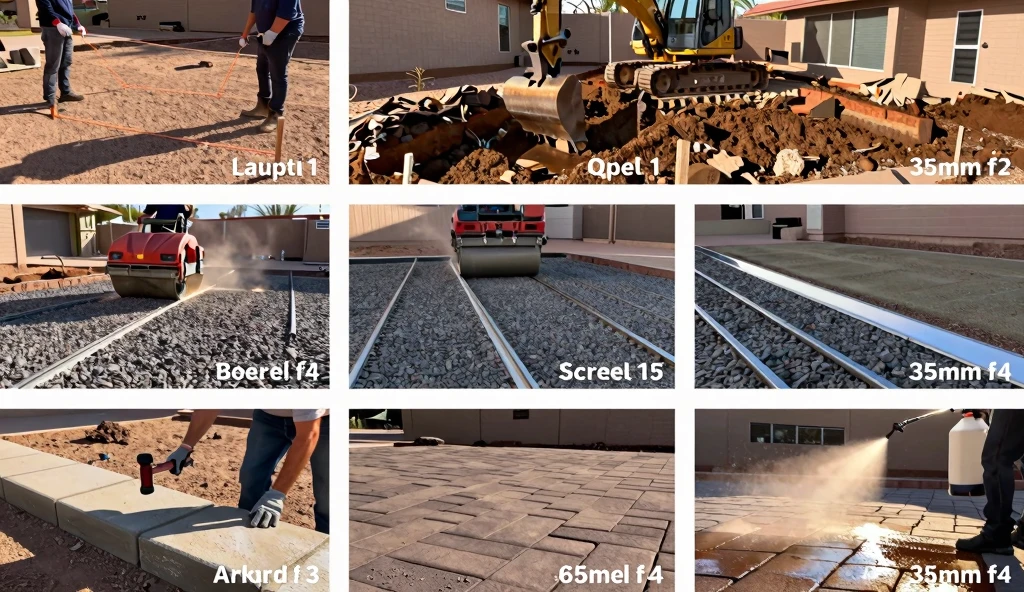
Common DIY Paver Patio Mistakes in Tucson
A lot of homeowners tackle smaller patios themselves and do a great job. Others end up with a surface that looks fine at first and sinks by the following summer. The difference almost always comes down to these six mistakes:
- Shallow excavation, 4 inches feels like work; 8–10 inches is what’s actually required
- Single-lift base, dumping all the gravel at once and compacting once doesn’t produce proper density
- Wrong sand type: Play sand and masonry sand compact differently than concrete sand; the setting bed must be the right material.
- No drainage slope, A flat patio fills with standing water during the monsoon season.
- Skipping polymeric sand, Standard sand washes out of joints in one Tucson rainy season.
- Not sealing, UV intensity in Southern Arizona, fades unprotected pavers noticeably within 2–3 years.
If the base preparation is the part you’re least confident about, that’s exactly where hiring a professional pays off. The surface work is manageable. The foundation determines whether it lasts.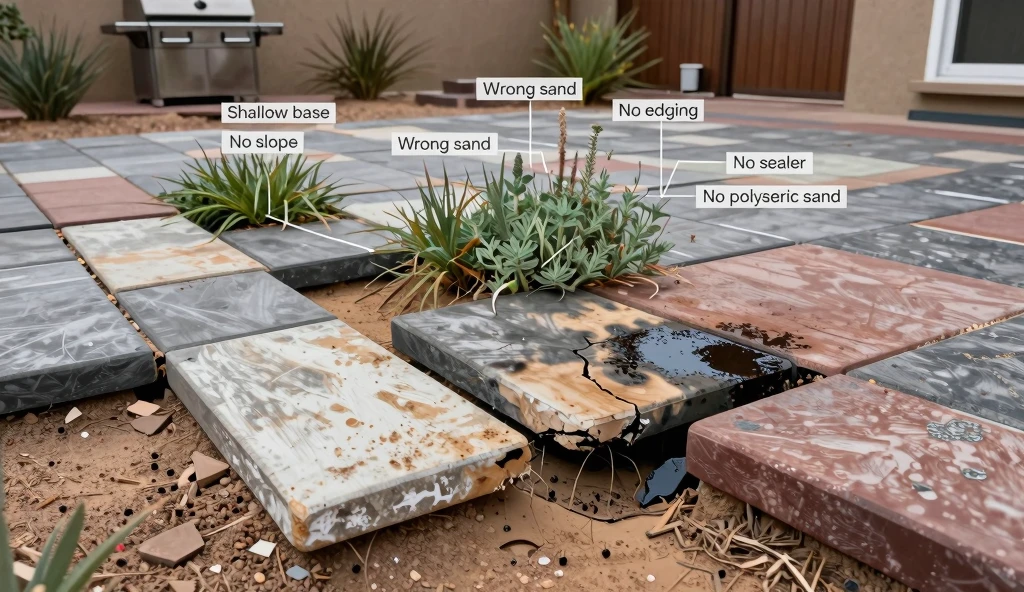
Long-Term Maintenance and Durability in Arizona
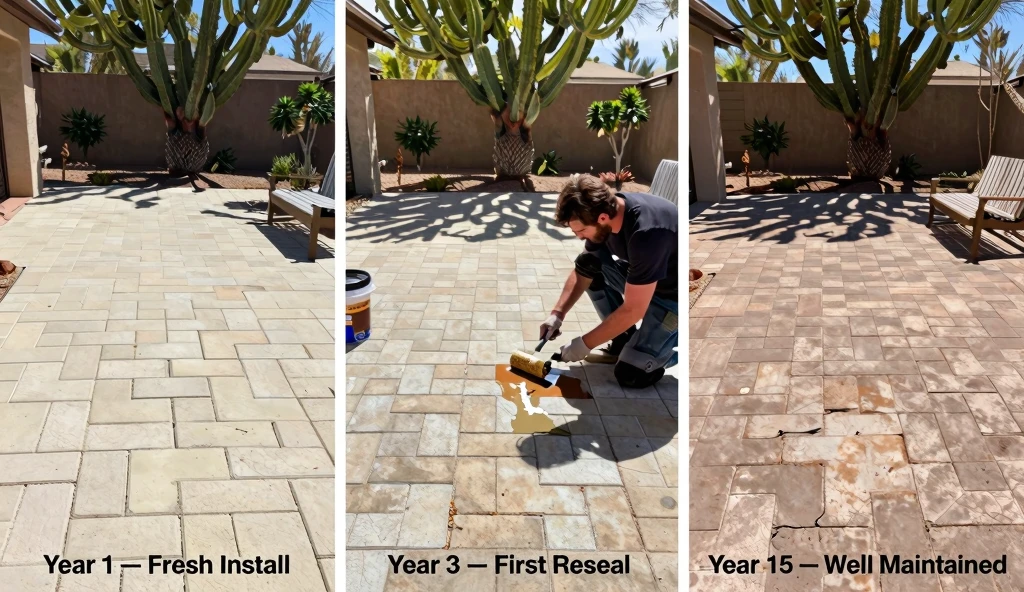
Sealing your paver patio every two to four years is the single most impactful maintenance step. A properly built paver patio in Tucson should last 30 to 50 years with minimal upkeep. Here’s a realistic maintenance timeline:
Year 1: Sweep and rinse as needed. Polymeric sand finishes curing fully over the first several weeks.
Years 2–3: First reseal recommended. Two full Tucson summers of UV exposure will visibly begin to fade unprotected concrete pavers.
Every 3–4 years: Reapply sealant. Inspect joint sand and replenish anywhere monsoon erosion has opened gaps.
When something shifts: Remove the affected pavers, re-level the base, and reset. A few hours of work, not a demolition project.
The contrast with concrete is significant. A cracked concrete slab in Tucson needs patching that never looks right, or full replacement. A shifted paver section gets repaired piece by piece and looks seamless afterward. Getting multiple quotes before starting your paver patio project saves you money and stress.
Resale Value: What a Paver Patio Does for Your Tucson Home
Outdoor living space has genuine resale value in Tucson, more so than in colder markets where a patio is seasonal. Buyers here expect usable backyard space. A plain dirt yard reads as work to be done. A clean paver patio reads as move-in ready.
Hardscape improvements generally return 50–80% of installation cost at resale. A $6,000 patio investment typically adds $3,000–$4,800 in appraised value, plus it helps your listing stand out when backyard photos drive so many purchase decisions in this market.
The designs that photograph best and resonate with Tucson buyers: light-colored pavers with clean geometric patterns, desert-integrated landscaping at the perimeter, and a defined gathering feature such as a fire pit, seating wall, or shade structure. A paver patio with desert-native landscaping around the border looks natural and stays low maintenance.
Seasonal Planning: When to Build in Tucson
Season | Conditions | Recommendation |
Spring (Mar–May) | Ideal ground conditions, moderate temps | Best time to build |
Summer (Jun–Sep) | Extreme heat, active monsoon | Possible but slower; plan buffer time |
Monsoon (Jul–Sep) | Saturated ground can’t be properly compacted | Expect weather-related delays |
Fall (Oct–Nov) | Second-best window; ground stabilized | Excellent for fire pit patios |
Pro Tip: If you want your patio finished before summer, start contractor conversations in February. Spring scheduling fills faster than most homeowners expect. The base preparation under your paver patio determines everything about how long it lasts.
How to Hire a Paver Patio Contractor in Tucson
The Tucson hardscape market ranges from highly experienced masonry contractors to seasonal labourers with a truck and a pitch. Telling them apart before work starts requires a few deliberate steps. A licensed Tucson contractor will build your paver patio to last decades not just years.
What to Verify Before You Sign
ROC license: Arizona’s Registrar of Contractors database is searchable online. Licensed contractors have passed testing, carry required insurance, and can be held accountable through the state if something goes wrong.
Base preparation specifics: Ask directly: “How deep do you excavate and how many inches of gravel do you use?” A contractor who says 3–4 inches of gravel on Tucson soil is telling you how long your patio will last. The correct answer is 4–6 inches of compacted crushed aggregate, installed in lifts.
Local project photos: Not stock photography. Not Phoenix or California work. Photos of Tucson-area patios they’ve personally installed, with addresses if possible.
Written scope: A professional quote specifies excavation depth, base material and thickness, paver material, edging type, jointing sand, and whether sealing is included. A single-line price with no detail tells you nothing about what you’re actually purchasing. Every paver patio we install in Tucson is designed to handle extreme heat UV exposure and heavy monsoon rain.
Contractor Red Flags
- Quote given verbally with no written breakdown
- No ROC license number when asked
- Requests more than 30% upfront before work begins
- Can’t show locally completed projects
- Significantly underbids all other quotes with no explanation
- Pressures you to decide the same day
The full guide to choosing the right masonry contractor covers every red flag worth knowing before you commit.
Thinking about hiring a professional? View our complete hardscape and masonry services in Tucson to see exactly what a quality installation includes.